Thursday, May 17, 2012

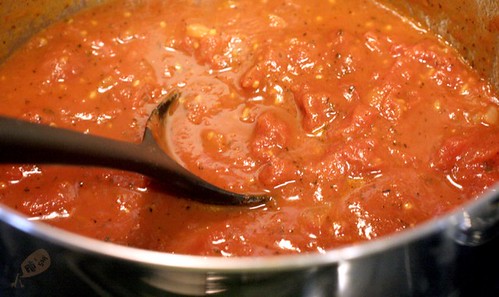
Delicious, Fat-Free Marinara

Difficulty: Beginner
When I started my diet last week, I had a lot of trouble eating large portions for dinner without cheating on my diet. I was looking for something low in fat and carbohydrates that I could gorge on. Luckily, I came across this delicious recipe that has no fat and few carbs, which goes perfectly on spaghetti, raviolis, tortellini, and just about any other type of pasta. If you aren't looking for a healthy recipe, feel free to cut the recipe in half and mix with an equal part of alfredo sauce for a delicious and creamy tomato sauce. You'll need:

6oz fat-free evaporated milk
12oz diced tomatoes (if you prefer fresh, dice 2 Roma tomatoes)
12oz tomato paste (or 2 Roma tomatoes blended in blender)
1 teaspoon dried oregano
3-4 cloves minced garlic
1/2 cup diced onion
2 teaspoons fresh or dried basil
salt and pepper to taste

Sautee onions, garlic, and a tablespoon of oil in a medium pot over mid-high heat. When the onions begin to turn glossy or the garlic begins to brown, turn down heat and add oregano and basil (if dried). Pour diced tomatoes and tomato sauce into the pot, and increase heat to medium. Let boil for about five minutes before adding evaporated milk, salt, and pepper. If basil is fresh, add it now. Serve over pasta with copious amounts of grated cheese.
Saturday, April 28, 2012

Amazing, Restaurant-Style Mac 'N' Cheese

Difficulty: Beginner

A short time ago I tried this thick, creamy recipe. It took me years of melting cheese over drained pasta to figure out the secret to making delicious macaroni and cheese, and now I won't make it any other way. The trick is to make the sauce in a separate saucepan from the noodles. This means you'll have another pot to wash, but it is so worth it for this incredibly easy, excruciatingly yummy dish. All you need:

About 1 and 1/2 cups cooked macaroni (or other preferred noodles)
2 tablespoons butter or margarine
2 teaspoons flour (cornstarch may work as substitute, but use less)
About 1/4 cup milk
At least 2/3 cup of two or more types of cheese
Salt and pepper, to taste
Optional: shake of garlic powder, depending on cheese choices

In a small pot, melt butter or margarine on medium-low heat. Slowly add flour, stirring to avoid lumps, until a thick paste is formed. Add milk slowly, stirring. Let sit on medium heat until mixture becomes hot and begins to steam. Add cheeses slowly. (I tend to use an Italian five-cheese blend, cheddar, and mozzarella, but American and Monterrey Jack are also good choices.) Stir until cheeses are melted. The mixture should be thick like warm taffy. If it is not thick enough, add more cheese until you reach desired consistency. If the mixture is too thick, adjust by adding milk incrementally. Pour mixture over well-strained noodles. If noodles have excess water, this will cause the sauce to become more runny and less thick and creamy. Add salt, pepper, and garlic powder. Enjoy!

Monday, April 16, 2012

Chocolate Covered Cheesecake Bites

Difficulty: Beginner

I tried making these for the very first time last week, and found out just how mouth-watering they really are. I was taken aback by how easy they were to make; I only spent about half an hour in the kitchen. Unfortunately, they took a long time to cool down before I could dip them in chocolate, so there is a long wait time. Luckily, they don't require constant surveillance, so they are labeled a beginner recipe. The ingredients you'll need:

For the crust:
1 cup graham cracker crumbs
1/4 cup melted butter

For the filling:
16oz cream cheese
2 eggs
1 teaspoon vanilla extract
1/2 cup granulated
1/4 cup sour cream
Optional: about 1/3 cup strawberry or raspberry syrup or preserves

For the coating:
24oz semisweet chocolate (I used chocolate chips)
3 tablespoons shortening


Preheat oven to 300 degrees F. Line an 8" by 8" glass pan with aluminum foil. Grease the foil. Combine graham cracker crumbs with butter and mix until evenly distributed. Pour into the bottom of the aluminum-covered pan, mashing down with a fork to cover the entire pan. Set aside.

In a large mixing bowl, heat cream cheese in the microwave for about thirty seconds or until it becomes easy to work with. Mix in the other filling ingredients except fruit, being sure that no chunks of cream cheese remain unmixed. Pour into glass pan and top with fruit syrup or preserves if chosen, using a knife to cut them in a marbled, swirling pattern into the mixture. Bake for 45 minutes. When done, the center may still be somewhat liquid-like, but the edges should be more solid like a cake. Touch the surface of the edges, and if it is still a liquid, bake longer. When finished, remove from oven and transfer to freezer after the pan has cooled enough to not destroy your freezer shelves. After an hour, remove from freezer, and cut each side into 5 sections, creating 25 squares. Place back in freezer until completely solid (for me, another two hours).

When it is close to finished, melt shortening and chocolate over medium heat in a large saucepan until melted. Remove cheesecake from freezer and re-cut the squares, pulling the aluminum foil up to help separate the squares. Use a fork and spear the squares, dunking them in the chocolate. Try to cover them entirely with the chocolate, but use a spoon to cover the bald spots if necessary. Set on wax paper and refrigerate until chocolate has solidified. Enjoy!

Sunday, April 8, 2012

Olive Garden's Zuppa Tuscana


Difficulty: Moderate
Reason: Somewhat time-consuming, multitasking

My family and I all love to go to Olive Garden for many of the delicious dishes, and one of our favorites is their Zuppa Toscana soup. We love the creamy broth, the tender potatoes, and the spicy sausage in it. However, it can get a bit pricey. Luckily, I found this recipe that tastes just like it came from the kitchen at Olive Garden, and it makes a lot more soup for a lot less money! To replicate, you'll need:

16 oz spicy Italian sausage (or 8oz spicy and 8oz mild for wimps like me)
3/4 cup chopped onion

3 cloves minced garlic
4 cups water
2 tablespoons chicken base (optional: for chicken broth instead of chicken base, use 2 cups broth with only 2 cups water instead of 4)
2-3 brown potatoes, cut into 1/2 inch chunks
2 cups kale, chopped (optional: substitute for spinach)
1/3 cup heavy whipping cream
(Optional: bacon crumbles)

Preheat your oven to 325 degrees F. Bake sausage for about 30 minutes, checking periodically. If sausage is still rare after a long time, this is okay, because it will continue cooking in the soup. If you need to fry the sausage in a pan, this is okay also.

While the sausage bakes, place onion with a few tablespoons of oil in a large pot over medium heat. Cook until glossy. Add garlic (and bacon) and cook until they are golden brown. Add chicken base (or broth), water, and potatoes. Cook until potatoes have become tender. Add the cream, kale, and sausage, making sure to drain the fat from the sausage before adding. (I did not drain all the fat the first time, and the soup turned out very greasy and unpleasant!) Turn the burner down and let simmer for another five minutes, or until kale becomes limp like cooked spinach. Serve with garlic bread or an Italian salad and enjoy!


Friday, April 6, 2012

Chinese Lemon Chicken with Sauce


Difficulty: Moderate
Reason: Simultaneously making sauce and cooking chicken.

Yesterday I tried this recipe for the first time, and was stunned to find how authentic the lemon sauce tasted. Lemon chicken is my favorite Chinese dish, and I am very picky about how it is prepared. However, it was just like the lemon chicken from my favorite restaurants. If nothing else, it was even crispier and more delicious. In order to make your own delicious meal, you will need:

For the chicken:
2 boneless chicken breasts, filleted
1 egg
1/4 cup flour
1/4 cup cornstarch
1 tsp salt
1 tsp pepper

For the sauce:
1 cup granulated sugar
1 lemon (2 for stronger lemon sauce)
1/2 tsp. minced ginger
1 tablespoon butter
2 tablespoons cornstarch
1/4 teaspoon garlic powder
2/3 cups water
1/8 teaspoon turmeric
Dash salt
Dash pepper

For chicken:
Heat oil in deep fryer to 375 degrees F, or heat oil in deep saucepan. Beat egg with salt and pepper. Mix flour and cornstarch. Dip chicken in egg mixture, then coat with flour mixture. Place in the saucepan or deep fryer and cook until chicken becomes a golden brown color, about 7 minutes.

For sauce:
Combine all the ingredients in a medium saucepan over medium heat. Cook until mixture becomes thick like jelly and takes on a glossy, clear hue. If after 15 minutes sauce is still not at desired consistency, add cornstarch by the teaspoon, allowing time to thicken between each teaspoon added. Pour sauce over chicken, serving with extra sauce on side if desired. Pair with steamed white rice.


Thursday, April 5, 2012

Homemade flour tortillas

Difficulty: Beginner

Just thinking about how fluffy and thick these tortillas are makes me hungry. I had never considered making my own tortillas until a local restaurant inspired me with their own thick tortillas. They aren't exactly alike, but it's hard to go wrong making these. All you need is:

4 cups white flour
1 and 1/2 cups water
2 teaspoons baking powder
2 tablespoons oil
A few teaspoons of salt
A few teaspoons of black pepper

Mix all the dry ingredients together, sifting thoroughly. Add oil, mixing with hands if necessary. Add water. Roll with floured rolling pin on floured surface until dough is as thin as possible. The dough is strechy and will  shrink back into a thicker tortilla shape if you let it sit, so make sure you place it on a hot skillet over medium heat quickly. If you have one, I prefer to use a griddle, because there is more space to work with, meaning you can cook multiple tortillas at once. Cook until spots become golden brown, and tortilla is no longer doughy on the inside. Cover with butter, sugar, and cinnamon for a sweet treat, or use it for tacos or fajitas. Enjoy.

Wednesday, April 4, 2012

Easy Three Berry Pie

Difficulty: Beginner

This dish was inspired by a late night sweet tooth, a bag of frozen berries from Costco, and pure laziness. It came out well considering how easy it was to make. You will need:

For the crust:
3 C flour
4 tsp white sugar
2 tsp salt
1 C vegetable oil
4 Tbsp milk

For the filling:
1 bag Kirkland frozen berry trio
2 tablespoons sugar
2 tablespoons flour

For the top:
3 tablespoons sugar

Preheat oven to 400. Set berries out to thaw (they don't need to be completely thawed before use; I only had them out for the amount of time it took me to make the crust). Combine dry crust ingredients in a bowl, mixing thoroughly, then add milk. Place 3/4 of dough in lightly greased 9 by 9 inch pan. Bake for 10 min, then add berries, sugar, and flour (as needed). This will not use the entire bag of berries. Top with crumbles of remaining dough and 3 tablespoons sugar. Bake for 30 minutes. Serve with vanilla ice cream, and enjoy.


Sugar Cookies and Snickerdoodle cookies


Difficulty: Beginner/Moderate
Reason: Slightly time consuming, dough can be difficult to mix by hand

These are the cookies I have been asked about many times. My friends especially love the snickerdoodles, because they are softer and fluffier than most snickerdoodle recipes, which usually turn out hard, thin, and crunchy. There is only one difference between the sugar cookie version and the snickerdoodle version, and that is the cinnamon-sugar coating on the snickerdoodles. You'll need:


1 cup (2 sticks) softened butter
1 teaspoon baking soda
1/2 teaspoon baking powder
1 egg
1 teaspoon vanilla extract
1 and 1/2 cups granulated sugar
2 and 3/4 cups white flour


For Snickerdoodles: About 1/4 cup granulated sugar
1-3 teaspoons cinnamon, judge by sight


Preheat oven to 375 degrees F. Combine butter sugar in a large mixing bowl. Add vanilla and egg. Sift flour with baking powder and baking soda, making sure the baking powder and soda are well-distributed through the  flour mixture. (I made the mistake of not mixing the baking soda and powder with the flour the first time I baked these cookies, and they turned out salty and fairly gross.) Slowly add flour mixture to the wet ingredients. Roll dough into small, 1.5 inch balls.


For Snickerdoodles: Mix the cinnamon and sugar and roll the dough in it before placing on baking sheet.


Bake for 11 minutes on ungreased cookie sheet until the tops of the cookies are no longer glossy and the edges show a slight hint of browning, then remove from oven.


Baked Coconut Shrimp with Sauce

Difficulty: Moderate
Reason: Peeling and cleaning shrimp

I tried deep frying these, but all the coconut shreds came off. Baking is healthier anyway! You'll need:


-uncooked shrimp
-at least 2 cups shredded coconut (sweetened or not)
-at least 1/2 cup unsalted, plain bread crumbs
-about 4 tablespoons sweetened condensed milk
-1 12oz-15oz can coconut milk
-about 1/4 cup sugar


Preheat oven to 400 degrees F. Cover a baking sheet with parchment paper, or grease baking sheet lightly. In a medium saucepan, combine about 4 tablespoons of sweetened condensed milk with coconut milk and about 1/4 cup sugar (to taste). Let boil for at least 5 minutes, stirring constantly. When done, the texture should be somewhat thick but not pasty. Let cool, then pour about 1/3 of mixture into a separate bowl. Set aside.


Mix two parts coconut shreds and one part bread crumbs in a large bowl and set aside.


Clean uncooked shrimp, removing shells and legs and rinsing under cool water. Butterfly the shrimp. Dip in the set aside coconut milk mixture, then in the breadcrumbs, and place in rows on the baking sheet. Place in the oven and cook for about 18 minutes. Add coconut shreds to the remaining 2/3 coconut milk mixture, and use as dipping sauce. Enjoy.


Cream Cheese Rangoons!


Difficulty: Beginner

I have never tried to make these before, but they are one of my favorite Oriental foods. I've heard they are easy to make, so I decided to try. These are the ingredients I used:

-bar of cream cheese

-handful of finely chopped green onions
-about 3 teaspoons garlic salt (garlic powder and salt are fine also)
-1 pack wonton wrappers (about $2 at Foodmaxx)


I heated up the cream cheese first to make it easier to mix. Ten seconds in the microwave sufficed. I mixed in the green onion and garlic salt, then dolloped about half a teaspoon into each wonton wrapper. I moistened the edges of the wonton wrappers to make them sticky, then folded them into the shape shown in the picture, pinching the top very tightly. I placed them in the deep fryer for about 4 minutes at 350 degrees F, making sure to submerge them completely for at least a minute (they float, so the top tends to be less cooked). I removed them from the fryer, waited for them to cool, and found that they were just as delicious as the rangoons at restaurants. The cost of all the ingredients was less than $5, and they were extremely easy to make. I don't think I will ever feel the need to buy rangoons again!